Export Timecard Data to TempWorks
Modified on: Thu, Feb 13, 2025 at 2:56 PM
This article explains how to generate timecard data in Timerack and export to TempWorks.
Send by Integration
Download a File to Import Manually
Send by Integration
1) Click Reports in the top navigation menu and then select the Payroll option on the left.
2) If Disconnected from TempWorks, click Connect to TempWorks to sign in to your TempWorks account.
Connection to TempWorks must be established before proceeding if you want to use the integration to import Timecard data. |  |
3) Enter your TempWorks Username and Password. |  |
4) Mark the Remember me checkbox to stay logged in.
| 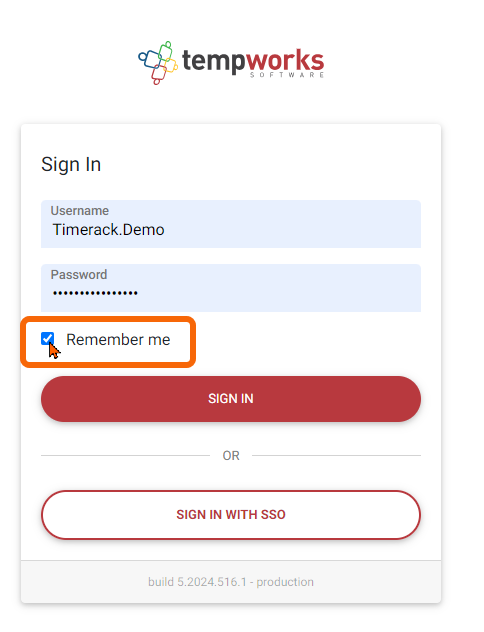 |
| 5) Click the Sign In button. |  |
You will be directed back to Timerack. When TempWorks is connected, the connection status indicator will update accordingly and the button will display Send to TempWorks.

6) Use the Pay Period Policy dropdown menu to select the Pay Schedule for which you want to generate data. | 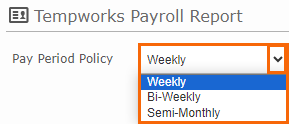 |
7) Use the Pay Period dropdown menu to select the Pay Period that corresponds to the currently open Billing Period in TempWorks.
Pay Period End Date must match the Week End date in TempWorks' Timecards section. | 
Please note: the Date Range option is not currently available for use with TempWorks integration. |
8) Mark the checkboxes in the Select Level section to select the Organization Levels for which you want to generate data. |  |
9) Click Fetch. |  |
10) The selected data will populate in the table below. Check for errors by using the scroll bar on the right of the data to view all rows. Correct all timecard errors and then repeat the previous steps.
| Red asterisk (*) before Employee Name | Punch is not attached to an assignment on timecard |
| Red asterisk (*) after Employee Name | Timecard is missing the In or Out punch (punch is unpaired) |
 |
| 11) Click Send to TempWorks. |  |
A message will display at the top of the page that Timecard data was sent successfully, and Timecards will populate in TempWorks.

If Timecard data are sent more than once, existing Timecards in TempWorks will be updated.
|
|
If TempWorks detects errors in the payroll data received, an alert bubble appears on the Payroll History tab adjacent to Payroll Report.

Click on the Payroll History tab to view history.
|  |
Locate the most recent payroll record and then click on the cloud icon in the Action column to download the file containing the TempWorks errors.

Error file example:

Resolve the errors in TempWorks and then resend the data.
Download a File to Import Manually
1) Click Reports in the top navigation menu and then select the Payroll option on the left.
2) Use the Pay Period Policy dropdown menu to select the Pay Schedule for which you want to generate data. |  |
3) Use the Pay Period dropdown menu to select the Pay Period that corresponds to the currently open Billing Period in TempWorks. | 
|
Pay Period End Date must match the Week End date in TempWorks' Timecards section.
4) Mark the checkboxes in the Select Level section to select the Organization Levels for which you want to generate data. |  |
5) Click Fetch. |  |
6) The selected data will populate in the table below. Check for errors by using the scroll bar on the right of the data to view all rows. Correct all timecard errors and then repeat the previous steps.
| Red asterisk (*) before Employee Name | Punch is not attached to an assignment on timecard |
| Red asterisk (*) after Employee Name | Timecard is missing the In or Out punch (punch is unpaired) |
 |
7) Click Save File Only. |  |
8) Enter a File Name that will identify the file.
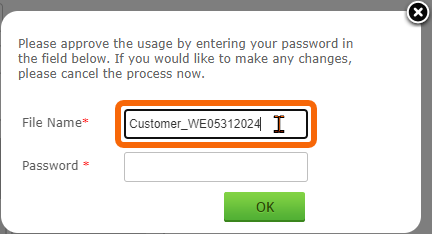
9) Enter the Password associated with your Timerack login credentials.
| 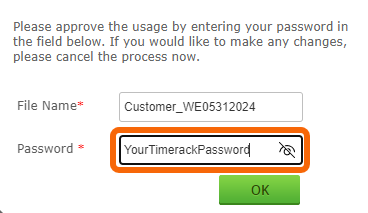 |
10) Click OK. | 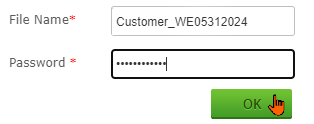 |
11) A message will display at the top of the page that Payroll submitted successfully. Click OK to dismiss the message.
12) Click Payroll History. |  |
13) Locate the applicable file in the list (most recent will appear on top). In the Action column, click the button with the down arrow to download the file to your computer. |  |

Click here to view the TempWorks Knowledge Base article on how to import timecards. |
|


